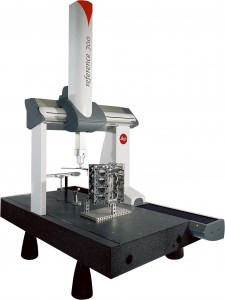
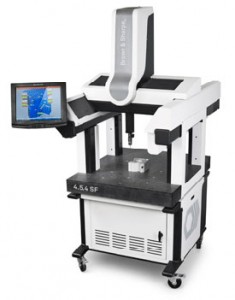
Building or expanding a shop isn’t cheap, but it is straightforward; most owners understand machine tools and know wher new features and benefits can make money. However, on the quality inspection side it’s a different world. Metrology is a science in itself and old-time machinists used to vernier calipers and hand-held “mikes” simply aren’t equipped to make a sensible first time equipment buy. Canadian Measurement and Metrology President Elliott Foster knows metrology and has some good advice for shops getting started in modern inspection and measurement. Canadian metalworking asked the questions:
What motivates a shop to upgrade to modern measurement equipment?
Most times the shops customers – aerospace is an example – demand a specific level of expertise and technology. Most companies are dragged kicking and screaming into setting up a modern inspection department. Manual inspection is dead. That kind of expertise isn’t there and when it is, it’s typically with a toolmaker or machinist. Their time is better spent at the bench, not doing inspection.

Do shops perceive quality and inspection as a moneymaker?
Generally it’s an afterthought. Many shops spend hundreds of thousands of dollars on machine tools, and leave nothing for inspection. Even the best machine tool can produce scrap. If we’re talking about a coordinate measuring machine, for example, it can save a company a lot of money, particularly when machining metals like titanium. Probably 90 per cent of the companies we deal with have been asked or told to purchase a coordinate measuring machine.
Do small shops know what questions to ask about metrology?
Usually, no. Most small shop owners look at a brand name, or they hire someone to run their quality department and they go with the machine that person is comfortable with. For a small shop with a good contract, I would look at the used machine market. They should look at the type of components they have to measure and look and the equipment their customer uses. Commonly, they contact the manufacturer of the equipment they’re interested in and arrange a demonstration on their parts.
Is used equipment a safe buy?
There are two ways to buy used equipment. One is to purchase it at an auction, in which case you have no way of knowing what you’re getting and the other is to source from a company that sells and supports the equipment. That way you get full training and support. Generally coordinate measuring machines haven’t changed in 30 years mechanically, but what has changed are sensors, probes, controls and software. You can buy a small machine for $10,000 with no spare parts availability. Or you can also buy a machine at about half the price of a new machine with excellent parts and service availability. Most people know machine tools, but not measuring machines. You need advice from people that know the business. It’s the same with machine tools. At some point you must surrender yourself to the sales team at the vendor. There’s so much out there today it’s bewildering. A simple demonstration with a pretty part isn’t enough. You must do research to make a proper purchase. Most shop owners buy coordinate measuring machines at an emotional level, not a practical level. Sometimes they fall in love with a name. Often, used machine buyers are more canny but they often buy because a customer or a friend has one; most people make a decision within 15 minutes of demonstration based on the perceived ease of use. The problem is the demonstration is made on a test part, not on the customer’s part.”
What defines “ease of use”?
There is no such thing. In reality, to successfully program and operate a coordinate measuring machine you need at least a week’s training. They should expect a six month ramp up, beginning with personnel with a prior quality background. GD&T (geometric dimensioning and tolerancing), projection angles, best fit alignments, it’s important to understand metrology. That’s the dilemma, but with the advent of CAD, the program can be written in the engineering office or CAD suite. Today you can write the program offline in the CAD area then port it to the CMM just hit run and your measuring parts!
How much will it cost?
Take a typical machine with a working volume of 700 mm per side. An entry-level machine with a two axis indexable head and CAD software could be $120,000. Used, it could be $50,000. Climate control and special conditions aren’t always necessary. For shop floor use we recommend a “hard bearing” (roller bearing) machine. 50 per cent of the machines we sell are used on the shop floor. There’s nothing wrong with measuring the part at the temperature at which it was machined. The only problems are airborne contaminants and vibration.

How much resolution is enough?
The average customer should not bother themselves with the fundamentals of metrology unless they’re involved with less than micron precision. The average customer is interested in accuracies within the range of 10 to 20micron. I would estimate that 90 per cent of the machines on the market can achieve that level of precision The key is to identify wher you are in accuracy terms. The traditional rule of metrology is 10 times; in other words, if you’re measuring to 100 microns, you would specify a 10 micron machine, but the costs go up exponentially. If a customer requires a 10 micron tolerance and asks for a 1 micron accuracy machine, it could cost a million dollars plus another $300,000 in environmental controls. It’s not practical.
What about calibration?
The entire personality of the machine resides in the control. Usually, the machine’s calibration matrix is propriety to the manufacturer. I would recommend going to the OEM manufacturer or to a calibrator that has demonstrated specific expertise. Calibrating a machine is one thing, bringing it into spec is another. It’s difficult for the independent calibrator to have the expertise. Like all vendors, we don’t calibrate closed architecture machines, only equipment we have expertise and training on.
First time buyers, beware
Most first time buyers generally want a quick fix. A second time buyer is a more educated buyer. When you buy a machine, look at the resources the vendor has. Do they have knowledgeable people? Do they have a service department? It’s no different than buying a car. The biggest single error is buying on price alone. If it sounds too good to be true, it probably is. If you buy a coordinate measuring machine for $15,000 to support an aerospace contract, the odds are against you. The other problem occurs when the buyer underestimates the resources they’ll need to bring the machine into full operation. If you’re fortunate enough to have an expert in CAD, then you can use less qualified people running the equipment. Don’t underestimate the importance of training. Probably 50 per cent of the shops in Canada won’t invest properly in training. Show me a problem in measuring equipment and almost always, I’ll show you a problem with the way it’s run. You can’t take someone from shipping and receiving and dro them into the job.
Elliott Foster is the president of Mississauga-based Canadian Measurement and Metrology. www.cmmxyz.com


